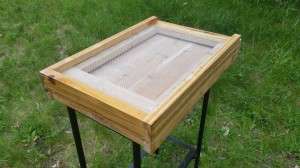
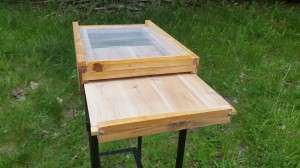
Rear view with Slide out Varroa Tray
MATERIALS LIST for 8 Frame Screened Bottom Board Plan:
| Description | Part | Qty | Dimension |
| Premium Grade, very occasional soft knots (repaired), no wane working with 1″ stock 7/8″ – .875 | A. Front Panel | 1 | 3 1/2″ x 13 1/4″ |
| B. Back Panel | 1 | 1 3/4″ x 13 1/4″ | |
| C. & D. Frame Sides | 2 | 1 3/4″ x 15 3/4″ | |
| E. & F. Exterior Grooved Sides | 2 | 3 1/2″ x 21″ | |
| G. Back Panel | 1 | 1 1/2″ x 12 1/4″ | |
| H. Front Exterior Panel | 1 | 2 1/2″ x 14″ | |
| I. Brace | 1 | 3 1/2″ x 12 1/2″ | |
| Flat stock | J. Tray | 1 | 1/4″ x 13 1/2″ x 20″ |
| 23 ga – 1/8″ – #8 | K. Hardware Cloth | 1 | 12″ x 18″ |
| Finishing nails | 16 ga | 2″ | |
| Staples | 18 ga | 1″ | hand staple to prevent damage to screen |
| Titebond III wood glue |
Basic Bottom Board Instructions:
- Build a frame with parts A-D
- Saw grooves into exterior sides , parts E & F, 7/8″ & 1/4″
- slide the frame into the grooved exterior sides, parts E & F
- staple the back board to the frame, part G
- attach front board, part H
- hand staple the 1/8″ hardware screen, part K
- install the brace, part I
- cut and install the tray, part J
A detailed schematic and diagrams along with a YouTube video will be posted soon. Sign up for product updates and you will be the first to know once this information is available.


